Wednesday, January 30, 2019

Solution: iPhone 7 won’t turn on and WIFI failure after dropping


Here is an iPhone 7 won't turn on after dropping, the iPhone motherboard is damaged, and there is a short-circuited problem, we can get a solution here!

First, try to power up, we found a large current leakage, and continue to test by digital multimeter , we know the 3V power supply short circuit. Observe seriously, the motherboard card slot position is bent, and the short circuit may be in this position. Remove the two capacitors next to the NAND flash by QUICK 861DW Hot Rework Station  and power on, the phone turn on normally.

 Test function after turned on, we found no Wifi, sometimes stuck when enter the settings. When check, the Wifi clock signal R0807 end has 1.8V, the other end through the Wifi module 17 pin have no voltage, we replace the resistor, but 
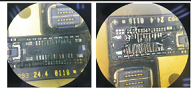
the fault remains. Remove the iPhone Wifi IC, the soldering pad drop the point.

Originally, we plan to turn on phone without install the Wifi module,  and test its function. But there is leakage when power-up, we have to apply rosin. After removing the heating capacitor and test, the setting function is normal, no longer stuck, next install the WiFi module.

Assemble the iPhone 7, power on iPhone, after entering the IOS system, test the iPhone WIFI function, the iPhone WIFI function is working. Continue to test the ohter functions, all works good. The repairs end!

Friday, January 18, 2019

2019 latest solution for iPhone 6 Plus No Display Problem


We received an iPhone 6 Plus to repair, the faulty described is that this iPhone 6 Plus doesn't display, after replacing the iPhone display power IC, the problem is still exist, and they have no idea how to fix, so they send iPhone to us. 


Disassemble the iPhone 6P by phone opening tools, carefully take out the iPhone motherboard.

Put iPhone motherboard under the Stereo Zoom Microscope and then use QUICK TS1200A hot air gun to re-weld the iPhone display power IC that has been replaced by co-worker, and then test it, but the iPhone screen is still not display.

Now use digital multimeter to measure the power output voltage -5.7V and 5.7V of the iPhone display IC, there is no output, which means the iPhone display power IC doesn't work properly.

Open the WUXINJI Dongle to check U1501 working principle, we know that if the iPhone display power need works properly, it must have 3 conditions, they were power supply, reset and boot signal. Measure the L1519, there is 4.2V main power supply, the reset signal 1.8V is also normal. When measure the boot signal, no voltage was found, this is abnormal.

Check FL2035, it's disconnected, remove it, and then short connect it with jumper wire.

Install the iPhone 6P, now the iPhone displays properly, the trouble has been solved.

Thursday, January 10, 2019

Repair iPhone X Rear Camera Failure With Hardware Solution

The iPhone X rear camera was damaged by dropping, during the rear camera disassembling, some iPhone X rear camera socket pins are fell off, we need to repair it, so the iPhone X rear camera can work normal. Here is the hardware solution for reparing this problem.


Firsly, remove the iPhone X rear camera socket,  observe it under the Trinocular Integrated Microscope .  We found that some pins are still not melted, but they has been remove, and the solder pad is deformed.

Clear up the J3900 rear camera solder pad, and then paint some tin on the solder pad. Now we need to solder the jumper wire by QUICK 861DW hot air rework staton on the solder pad.


After soldering the jumper wire, wrap them up one by one, apply some green UV oil to it, and then use UV lamp light to solidify them.

Welding tin balls to freshly welded jumper wire,  and then  install the socket.  Apply some solder paste to those pins, and then use QUICK TS1200A soldering iron to weld it.

Install the iPhone X,  press the iPhone power button, it is turned on smoothly. After entering the IOS system, turn on camera, the iPhone X rear camera can work normally. Test other functions on iPhone X, all works perfectly, the repairs end! 


Wednesday, January 2, 2019

Repair Guide: iPhone 6 Plus rear camera not working


A customer sent us an iPhone 6 Plus to repair, after turned on iPhone rear camera, it shows black and no images, the iPhone rear camera is not working. Toggle it to front camera, it works good, the iPhone front camera can take pictures. How to repair this iPhone 6P rear camera not working problem? 


According to the trouble phenomenon, the iPhone 6 Plus rear camera won't take pictures, but the iPhone front camera can take pictures, which means the public control part is normal, we just need to check circuits that are only used in the iPhone rear camera.

Firstly, we need to disassemble the iPhone 6 Plus. Use JM-P01 Phone Teardown Toolkit to disassemble the iPhone 6P, and then remove the iPhone display assembly.

Secondly, replace the new iPhone rear camera. After replacement, the iPhone rear camera still not working, the failure is the same. Now we confirmed that it's not the problem of the iPhone rear camera, we need check circuits.

Thirdly, use digital multimeter to measure the power supply of the iPhone rear camera, when measured the 34th pin, we found it has no voltage.

Fourthly, open the ZXW dongle to check iPhone schematic diagram, we saw that this circuit is the power supply of a 2.8V, it's supplied by camera LDO chip U2301.

Fifthly, use QUICK 861DW hot air rework station to remove the camera LDO chip U2301, and then install the new U2301. After installation, measure it again with the digital multimeter, now the data measured is normal.

Finally, assemble the iPhone 6 Plus, power on iPhone and test it, now the iPhone rear camera works properly, it can take pictures and videos.

2021 IBOX2 PCIE NAND DFU Purple Screen Programmer For iPhone/iPad Repair

This is an article about the introduction of ibox2 programmer features, the main functions of the ibox2 programmer are PCIE Nand flash prog...