Friday, October 22, 2021

2021 IBOX2 PCIE NAND DFU Purple Screen Programmer For iPhone/iPad Repair

This is an article about the introduction of ibox2 programmer features, the main functions of the ibox2 programmer are PCIE Nand flash programming, unbind wifi,DFU purple screen mold for iPhone/iPad.


1. iPhone/iPad PCIE Nand flash memory IC programmer

- Ibox2 programmer can read and write format SYSCFG data of the PCIE BGA110 Nand flash, including iPhone nand flash and iPad nand flash.

- One-click to unbind the WIFI for PCIE Nand flash.

- The detailed model is as follows:

8/8P/SE2/X/XR/XS/XsMax/11/11Pro/11promax
IPxd_mini5
IPxd_Air3
IPxd_8 (2020)
IPxd_Pro (11,2th)
IPxd_Pro (12,9, 3th)
IPxd_Pro (12,9, 4th)

2. DFU Purple screen mold for iPhone iPad

- One-click to enter the purple screen for iPhone/iPad.

- Support to read and write Serial number/Bluetooth/Wifi address without disassembling

- The detailed model is as follows:

6/6P/SE/6S/6SP/7/7P/8/8P/X
IPad  mini 2
IPad mini 3
IPad mini 4
IPad air
IPad air 2
IPad5
IPxd6
IPad Pro (9,7)
IPad Pro (12,9)


Wednesday, October 20, 2021

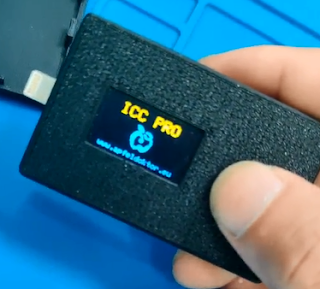
Fixed ICC PRO Tristar Tester Doesn't Turn On!

Here is an ICC Pro Tristar Hydra Tester doesn't turn on, when press power button, it has no reponse, the screen keeps black. How to fix ICC PRO V2 tester no power issue?


Firstly, we can use the cable and plug in the charger to charge the ICC Pro tester, and press the switch of ICC Pro tester continuously for about 5 minutes, and then we will see the ICC pro screen light up.


If the above method doesn't work, then we need to charge the ICC Pro in another way.

Firstly, we need to open the ICC pro tester. Use a screwdriver or mobile phone pry tool to open the ICC Pro tester housing. (The new ICC Pro V2 tester is screw-secured, so we can use screwdrivers to remove the screws and open the case)

Them connect the ICC PRO tester with a DC power supply, and turn on DC Power supply to charge ICC Pro Tester for a while.


Now disconnect, and press the ICC Pro Tester power button, we will see the ICC pro screen light up, and it turns on successully.


Monday, January 20, 2020

iPhone XR actviation failure- Solution!

 Here is an iPhone XR with actviation failure, the iPhone XR can't be activated, it stucks on SN interface. Hers is a solution to fix iPhone XR actviation failure.


Disassemble the iPhone XR. Use qianli 3D screwdriver and CPB screen separator to open the iPhone XR screen. Remove the iPhone XR display assembly, disconnect the battery, and then take off the iPhone XR motherboard.

We noticed that this iPhone XR has repair marks.  The baseband shield cover has been disassembled, and there is repair sticker on it. And we found that the iPhone Nand flash also been repaired before, because there are some black glue around it.

Remove the repair sticker, obviously the iPhone baseband has been repaired before, the capacitors and resistors around it has been corroded and blackened.

Use Jabe UD-1200 soldering iron to smoke rosin to the motherboard, so the solder oil for the bottom pin of the IC assembly can be replaced.

Use hot air gun and tweezers to remove the iPhone baseband. Put the iPhone motherboard under a microscope to observe, the iPhone baseband IC doesn't looks good. Apply some solder paste to the baseband, and then reballing it.

After reballing, assemble the iPhone XR to test it, but the failure is still the same.

Use ADMS9 digital multimeter to measure the resistance value for the iPhone baseband power supply, we found all resistance value measured are normal.

Check iPhone motherboard again, we found the RF IC also has been repaired before, use hot air gun and tweezers to replace the RF IC, and then assemble the iPhone XR.

Now restore the iPhone XR with iTunes, and then follow the tips to activate the iPhone XR, it goes well, the iPhone XR was activated successfully.

Saturday, January 11, 2020

Troubleshooting: iPhone 7P get boot failure after dropping

This iPhone 7P get boot failure after dropping, press the iPhone power button, the iPhone has no response, in a word, the iPhone 7 plus won't turn on.  We need to fix it.


Use phone disassembling tools to disassemble the iPhoen 7P, remove the iPhone display screen, disconnect the battery, and then take out the iPhone 7P motherboard.

Use UNI-T UTP3305 DC power supply to measure the iPhone 7P motherboard , trigger it, the current up to 60mA and then downs to 0, the current jumps like this over and over again, which is abnormal.

Use digital multimeter to measure the relevant voltage for the RAM, they all normal.

As we know, for the drop-damaged iPhone, the iPhone CPU virtual welding is more likely. Put the iPhone motherboard on the PCB holder fixture, and then put it under a Trinocular Microscope.

Use BGA graver blade to remove the black glue around the iPhone CPU to check if the iPhone CPU is virtual welding, but it's normal.

Based on our experience, the RAM for drop-damaged iPhone 7P is easy to short, let's remove the iPhone CPU, after removing CPU, we found the solder pad missing some pins.

Use JBC CD-2SHE soldering iron to clean the solder pad, and then solder the missing pins. After handling the solder pad well, install the iPhone CPU back to the motherboard.

Now measure the iPhone 7P motherboard with UNI-T UTP3305 DC power supply, the current tested is normal.

Install the iPhone 7 Plus, press the power button, the iPhone 7 plus is turned on successfully.

Saturday, December 14, 2019

Best replacement way for iPhone 11 Pro Max A13 RAM


Here is a replacement way for replacing iPhone iPhone 11 Pro Max A13 upper layer. Use screwdriver to remove the screws at the bottom of the iPhone screen, open the screen with a LCD sucker. Remove the iPhone display screen, disconnect the battery, and then take out the iPhone 11 Pro Max motherboard.

Put iPhone 11 Pro Max motherboard to the SS-T12A heating station for separating the board, take off the iPhone 11 Pro Max motherboard upper layers, and attach it to the MJ K30 PCB holder.

Put iPhone motherboard under a Stereo Zoom Microscope to observe the A13 SDRAM, it looks good. Now use QUICK 861DW hot air gun and CPU removal blade to remove the A13 SDRAM, insert the blade from the right corner of the A13 CPU, and then slide to the top right corner. Once the SDRAM has been removed, next we need to remove the glue.

Use BGA removal blade to remove the glue on the CPU, and then clean it with PCB cleaner. Now connect the iPhone 11 Pro Max motherboard to the DC power supply to measure the current, after measurement, the current is normal.

Place the A13 upper layer to the right position, and then use hot air gun to install it back the motherboard.

Once down, cooling the motherboard, and then install the iPhone 11 Pro Max.

Press the iPhone power button, the iPhone 11 Pro Max turns on properly, and then test the iPhone functions, everything works well.


Saturday, November 30, 2019

Drop-damaged iPhone XS Max Face ID not working- Fixed

 Here is a drop-damaged iPhone XS Max, the result is that the iPhone XS Max Face ID is not working. How to fix it?


First, we need to disassemble the iPhone XS Max. Use phone screen opening tools to disassemble the iPhone XS Max, remove the iPhone XS Max display screen and iPhone battery, and then take out the iPhone XS Max motherboard.

Use SS-T12A heating station to separate the iPhone XS Max motherboard, and then put it on the iSocket test fixture.

Use digital multimeter to measure the resistance value for iPhone XS Max Face ID connector, when we measured the 17 Pin of the infrared camera, we found it had no resistance value, but the value for the 15 Pin was normal, which is why the iPhone XS Face ID doesn't works. The circuit between the iPhone CPU and iPhone infrared camera 17 Pin are virtual-welded or disconnected.

Now we need to remove the glue for iPhone CPU, put iPhone motherboard under a microscope, and then use BGA graver blade to remove the glue around the CPU.

Apply some solder paste around the CPU, and then use QUICK 861DW hot air gun and BGA graver blade to remove the iPhone CPU. After the iPhone CPU is removed, use soldering iron to handle the residual glue on the solder pad, and then use JBC CD-2SHE soldering iron to solder a jump wire from 17 Pin to test if the circuit between iPhone CPU and iPhone infrared camera 17 Pin are disconnected.

After soldering, measure it with digital multimeter, the data tested is normal, now we confirm that the iPhone CPU is virtually welded, we need to re-install the iPhone CPU.

Reballing the iPhone CPU, and then install the iPhone CPU back to the motherboard. After the motherboard is cooled, use digital multimeter to measure the 17 Pin, now the resistance value is back to normal.

Next, use iSocket test fixture to test it, the iPhone XS Max Face ID tested is normal. At last, install the iPhone XS Max.

Friday, October 25, 2019

Solution: iPhone X restarts automatically after water damage

The iPhone X restarts automatically after water damage, when playing music or turn on speaker, it shuts down and restarts automatically. Here is solution to fix it.


Use screwdrivers to remove the screws at the bottom of the iPhone screen, and then put iPhone X on the CPB screen separator for heating, after a while, use screen pry tools to open the iPhone screen. Remove the iPhone X display assembly, disconnect the iPhone X battery and then take off the iPhone X motherboard.

Separate the iPhone X double layer board. Attach the iPhone X motherboard to the G-LON PCB holder fixture, use hot air gun and BGA graver to separate the board, use tweezers to remove the upper board.

Put iPhone X motherboard under a microscope, and continue to observe it, we found the iPhone front audio IC and iPhone ringtone IC are damaged, we need to replace them.

Carefully use QUICK 861DW hot air gun and tweezers to remove the iPhone front audio IC and iPhone ringtone IC, apply some solder paste to the solder pad, and then use DES H95 Phone rework station to solder these 2 chips back the motherboard.

Now re-soldering the iPhone X upper layer board and lower layer board, and then assemble the iPhone X. Turn on the iPhone X and test it, when playing the music or turn on speaker, the iPhone X still working properly.


After testing for a day, everything goes well on the iPhone X.

2021 IBOX2 PCIE NAND DFU Purple Screen Programmer For iPhone/iPad Repair

This is an article about the introduction of ibox2 programmer features, the main functions of the ibox2 programmer are PCIE Nand flash prog...